

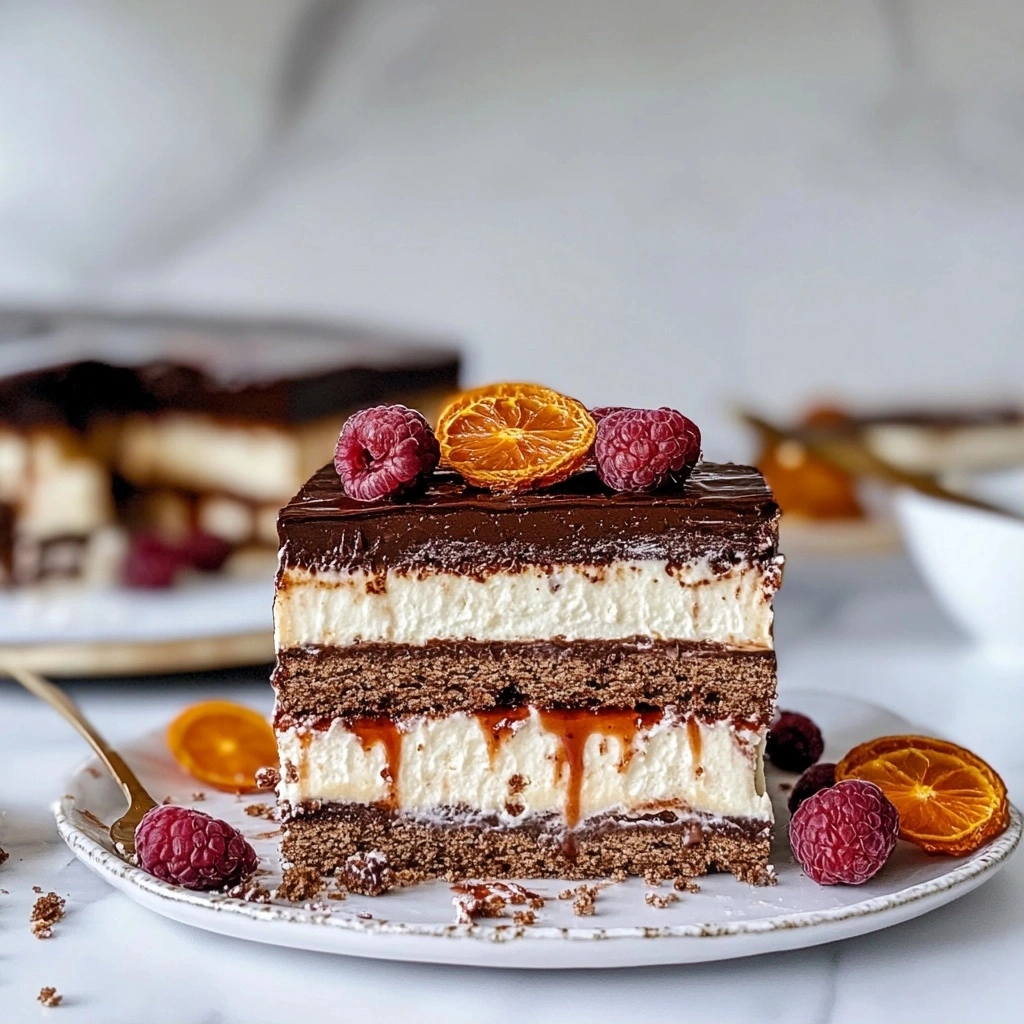
The whipped cream is billowing, and the layers of cookies are stacked high. The fridge hums softly as I dive in for a taste — creamy, rich, and utterly irresistible. Icebox cake is coming together effortlessly, a showstopper that requires no baking.

This is perfect for those summer nights when you want dessert but don’t want to heat up the kitchen. Unlike traditional cakes, this version uses store-bought cookies for a quick assembly and chilling time. It’s indulgent yet refreshingly light (thanks to the whipped cream). Just layer and chill. Easy perfection awaits!
Why You’ll Love This icebox cake
- Effortless Prep: Just layer and chill! No baking needed, making it perfect for busy days.
- Decadent Flavor: Rich chocolate or fruity layers create a delightful explosion of taste in every bite.
- Crisp-Tender Layers: The cookies soften perfectly over time, providing a unique texture that keeps you coming back.
- Versatile Delight: Switch up the flavors with different fruits or creams to match any occasion or craving.
- Realistic Limitation: It does need some chilling time—at least 4 hours—so plan ahead if you’re serving guests!
icebox cake Ingredients

Cake Layers:
24 pieces chocolate wafer cookies — choose high-quality for the best flavor and texture.
Filling:
2 cups heavy whipping cream (chilled) — make sure it’s very cold for optimal whipping.
1/2 cup powdered sugar (adjust to taste) — feel free to use granulated sugar if needed.
1 teaspoon vanilla extract — don’t skip — it’s essential for enhancing the overall flavor.
Topping:
1 cup chocolate shavings (for garnish) — use a vegetable peeler on a chocolate bar for easy shavings.
*Full measurements in the recipe card below.*
How to Make icebox cake
1. Whip the Cream: In a large bowl, beat the chilled heavy whipping cream, powdered sugar, and vanilla extract on medium speed until soft peaks form, about 3-5 minutes.
2. Prepare Layers: Take a rectangular dish and lay down 8 chocolate wafer cookies in a single layer. Make sure they’re evenly spaced to form the base.
3. Spread Filling: Spoon about one-third of the whipped cream mixture over the cookie layer, smoothing it out evenly with a spatula. This creates a creamy layer that will bind everything together.
4. Repeat Layers: And repeat the process by adding another layer of cookies followed by more whipped cream mixture twice more, finishing with whipped cream on top for a beautiful icebox cake finish.
5. Chill Properly: Cover the dish with plastic wrap and refrigerate for at least 4 hours or overnight until set; you’ll know it’s ready when it’s firm to the touch and holds its shape.
6. Add Garnish: Before serving, sprinkle chocolate shavings generously on top for an elegant touch; watch out—if you rush this step, the cake might lose its beautiful layers when cutting.
7. Serve & Enjoy: Cut into slices and serve cold to enjoy every creamy bite of this delightful dessert! *Exact quantities in the recipe card below.*
How to Store icebox cake
- Room Temperature: It’s best to keep icebox cake in the fridge, but if you must, use a covered container for up to 2 hours. After that, it’ll start to get too soft.
- Refrigerator: Store in an airtight container or tightly wrapped with plastic wrap for up to 5 days. The layers might soften a bit, but the flavor will still be great!
- Freezer: You can freeze individual slices wrapped in plastic and foil for up to 3 months. Just know that the texture can change once thawed.
- Reheating: If you want to enjoy it slightly warmed, pop it in the microwave for about 15 seconds — look for a slight melting of the edges to know it’s ready.
What to Serve with icebox cake?
It’s a sweet treat that can feel heavy on its own, so serving it with something light or tart will enhance your experience.
- Fresh Berries: Try topping it with strawberries or raspberries for a burst of acidity that balances the sweetness.
- Mint Tea: A chilled mint tea offers refreshing coolness, making each bite feel lighter and more invigorating.
- Citrus Sorbet: A scoop of lemon sorbet adds a zesty contrast, cutting through the richness with its icy temperature.
- Chopped Nuts: Sprinkle some toasted almonds for a delightful crunch that introduces a pleasing texture difference.
- Greek Yogurt: A dollop of tangy Greek yogurt complements the sweetness while adding creaminess without being too heavy.
- Fruit Salad: Mix together seasonal fruits; the variety brings color contrast and bright flavors that uplift the dish’s richness.
- Coffee: Serve it alongside a cup of strong coffee to introduce bitterness, creating an enjoyable flavor balance.
- Dark Chocolate Shavings: Add some shavings on top; they provide depth and slight bitterness to counteract the overall sweetness.
icebox cake Variations
Here’s how to play with this recipe and customize your icebox cake for different flavors and textures.
- Mint Chocolate: Add 1 tsp peppermint extract to the cream for a refreshing twist.
- Coffee Infusion: Mix in 2 tbsp instant coffee granules with the powdered sugar for a rich, caffeinated kick.
- Fruity Layer: Incorporate 1 cup of crushed berries into the filling for a fresh, fruity flavor.
- Nutty Delight: Fold in 1/2 cup finely chopped nuts to the whipped cream for added crunch and texture.
- Next Level Mocha: Combine 1 tbsp cocoa powder and 2 tbsp espresso powder with the cream for an indulgent mocha experience.
- Substitution Option: Use 2 cups of non-dairy whipped topping instead of heavy whipping cream for a dairy-free version.
Make Ahead Options for icebox cake
I love making icebox cake ahead of time because it’s so convenient. You can prepare the layers and filling up to two days in advance. Just whip the heavy cream with powdered sugar and vanilla, then layer it with the chocolate wafer cookies in an airtight container—like a glass baking dish covered with plastic wrap. The cake actually gets better as it chills, but I’ve found that the chocolate shavings are best added right before serving to keep them fresh and crunchy. While the filling holds well, those cookies can get a bit too soft if you leave them too long. Enjoy making it ahead!
icebox cake Recipe FAQs
Can I make icebox cake ahead of time?
Absolutely! Icebox cake is perfect for making ahead. In fact, it tastes even better after chilling overnight, as the flavors meld together beautifully. Just be sure to cover it well with plastic wrap to prevent any odors from the fridge seeping in. Keep in mind that if you wait too long to serve, the cookies may become very soft, so aim for a maximum of 2-3 days in the fridge.
Why did my icebox cake turn out runny?
If your icebox cake turned out runny, it’s likely due to not whipping the cream enough. You want stiff peaks to form when whipping; this gives your filling structure and helps hold everything together. If you see a watery mixture instead, just whip it longer until it’s thick and fluffy. Remember to use chilled cream for better results!
How should I store this dish?
You should store this dish in an airtight container or covered tightly with plastic wrap in the refrigerator. It’ll keep well for about 2-3 days, but after that, you might notice a change in texture as the cookies soften further. If you’re making it ahead of time for an event, consider serving within that timeframe for the best experience.
What can I substitute for chocolate wafer cookies in this recipe?
If you can’t find chocolate wafer cookies, graham crackers are a great substitute! They won’t have the same chocolate flavor but will still provide a deliciously sweet crunch between layers. You could also try using other thin chocolate cookies if available; just ensure they’re similar in size so your layers stay even and appealing.
Final Thoughts on icebox cake
Icebox cake is a fantastic choice for those busy days when you want to whip up a dessert without spending hours in the kitchen. The way the chocolate wafer cookies soften into a creamy, rich filling after chilling creates an incredibly satisfying texture and flavor that’s hard to beat. If you’ve been looking for a no-fuss treat that still feels special, give this recipe a try. I’d love to hear how yours turned out in the comments!
icebox cake
Ingredients
Method
- In a mixing bowl, combine the heavy whipping cream, powdered sugar, and vanilla extract.
- Using a whisk, whip the mixture until stiff peaks form.
- Spread a thin layer of the whipped cream mixture on the bottom of the loaf pan.
- Layer 4 chocolate wafer cookies over the cream, then add another layer of whipped cream on top.
- Repeat the layering process until all cookies and cream are used, finishing with a layer of whipped cream.
- Cover the loaf pan with plastic wrap and refrigerate for at least 4 hours or overnight.
- Once chilled, remove the cake from the pan and place it on a serving platter.
- Top with chocolate shavings before slicing and serving.
