Introduction
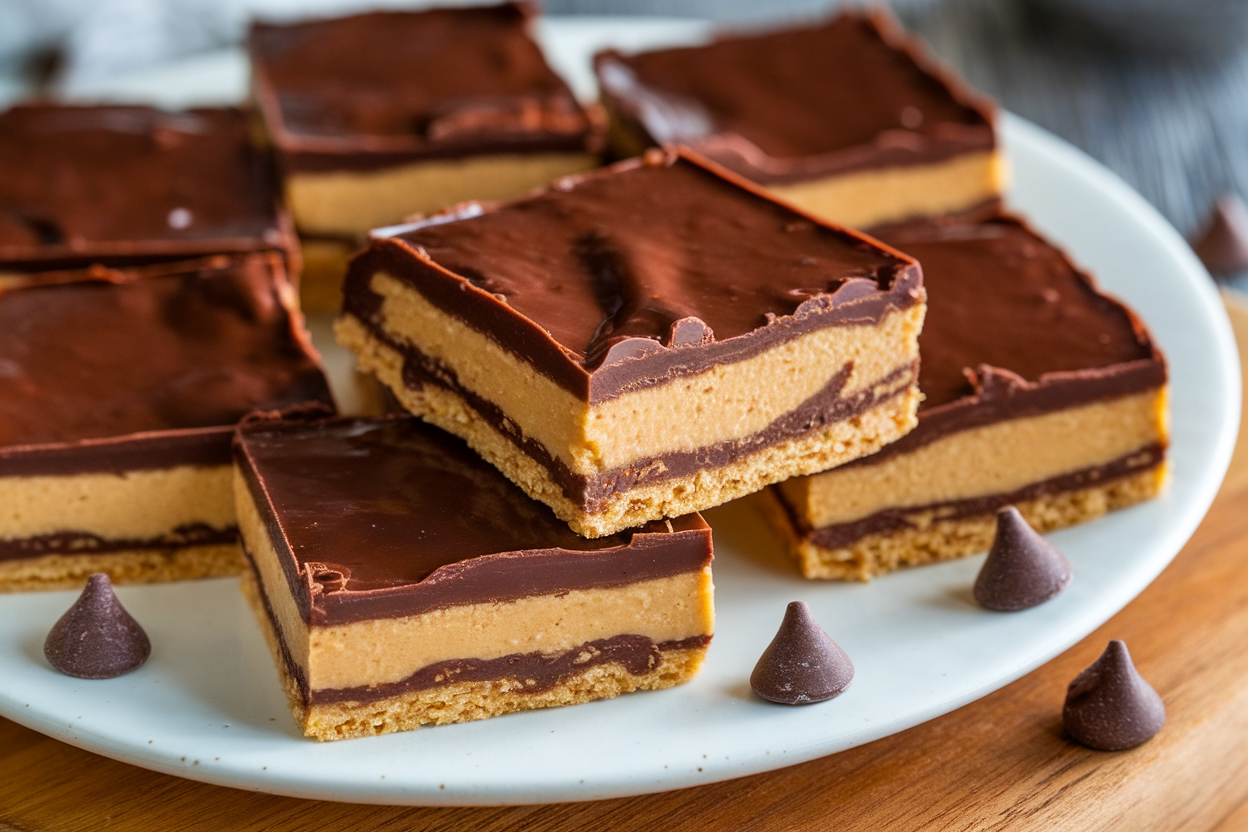
If you’re looking for a decadent dessert that’s easy to make and requires no baking, these No-Bake Chocolate Peanut Butter Bars are perfect. Combining the rich, creamy flavors of chocolate and peanut butter, these bars taste like a cross between a peanut butter cup and a candy bar but without the hassle of an oven. Perfect for summer, these treats are ideal for anyone looking to whip up something delicious with minimal effort. These bars are crowd-pleasers at potlucks, family gatherings, or any time you crave a quick dessert that doesn’t skimp on flavor. In this post, we’ll take you through everything you need to make these bars, plus tips, tricks, and storage advice to help you get the best results every time.
What You’ll Need

The ingredients for No-Bake Chocolate Peanut Butter Bars are simple and likely already in your pantry. With only a handful of items, you’ll be able to create a layered treat that’s both rich and satisfying.
- Peanut Butter: Creamy peanut butter works best for smooth, cohesive bars. Opt for regular peanut butter rather than natural varieties, as the oil in natural peanut butter can separate and affect the consistency.
- Butter: Butter is a key ingredient, providing richness and helping to bind the peanut butter layer. Unsalted butter is recommended to control the saltiness of the bars.
- Powdered Sugar: Powdered sugar sweetens and stabilizes the peanut butter mixture, giving it a smooth, thick texture.
- Graham Cracker Crumbs: Adding graham cracker crumbs gives structure to the peanut butter layer, providing a slightly crunchy texture and balancing the sweetness.
- Chocolate Chips: Semi-sweet or dark chocolate chips create a smooth, chocolatey topping. Semi-sweet chocolate offers a balanced sweetness, while dark chocolate adds a bit of bitterness for those who prefer a less sweet treat.
- Vanilla Extract: A hint of vanilla extract enhances the flavor of the peanut butter layer, adding warmth and complexity.
These ingredients are straightforward, but together, they create a delicious, layered dessert that’s hard to resist. Now that we’ve gathered our ingredients, let’s go through the steps to bring these bars to life!
How to Make No-Bake Chocolate Peanut Butter Bars
Making No-Bake Chocolate Peanut Butter Bars is incredibly simple. Follow these steps to create this delicious treat in under 20 minutes!
Ingredients:
- 1 cup creamy peanut butter, plus ¼ cup for topping
- ½ cup unsalted butter, melted
- 1 cup powdered sugar
- 1½ cups graham cracker crumbs
- 1½ cups semi-sweet chocolate chips
- 1 tsp vanilla extract
Instructions:
- Prepare the Peanut Butter Layer: In a medium mixing bowl, combine 1 cup of peanut butter, melted butter, powdered sugar, and graham cracker crumbs. Stir until the mixture is well blended and has a thick, dough-like consistency.
- Press Into a Baking Dish: Line an 8×8-inch baking dish with parchment paper, leaving some overhang for easy removal. Press the peanut butter mixture evenly into the bottom of the prepared dish, smoothing it out with a spatula or the back of a spoon.
- Melt the Chocolate Layer: In a microwave-safe bowl, combine the chocolate chips and remaining ¼ cup of peanut butter. Microwave in 20-second intervals, stirring between each, until the chocolate is fully melted and smooth. Be careful not to overheat the chocolate, as it can burn.
- Pour Over Peanut Butter Layer: Pour the melted chocolate mixture over the peanut butter layer, spreading it evenly with a spatula to cover the entire surface.
- Chill Until Set: Place the dish in the refrigerator and chill for about 1-2 hours, or until the chocolate layer is firm.
- Slice and Serve: Once set, use the parchment paper overhang to lift the bars out of the dish. Slice into squares or rectangles with a sharp knife and enjoy!
Serving and Storage Tips

These No-Bake Chocolate Peanut Butter Bars are easy to serve and store, making them a great option for make-ahead treats.
- Serving Suggestions: These bars are rich and flavorful on their own, but you can add a few extra touches for presentation. Dust the tops with a sprinkle of sea salt for a sweet-and-salty twist, or drizzle with melted white chocolate for a decorative finish. These bars are dense, so cutting them into smaller portions makes them ideal for serving as bite-sized treats.
- Storing in the Refrigerator: To keep these bars fresh, store them in an airtight container in the refrigerator. They’ll stay good for up to a week, and the chilled chocolate layer adds a satisfying snap to each bite.
- Freezing for Longer Storage: If you want to store them longer, these bars freeze well. Place the cut bars in a single layer on a baking sheet and freeze until firm. Then, transfer them to a freezer-safe container, placing parchment paper between layers to prevent sticking. They’ll last up to 2 months in the freezer, making them perfect for make-ahead treats.
- Thawing and Serving Frozen Bars: To enjoy from frozen, let the bars thaw in the refrigerator for about 30 minutes. You can also enjoy them straight from the freezer if you prefer a firmer texture.
Mistakes to Avoid
Although this recipe is straightforward, there are a few common mistakes to watch out for to ensure your bars turn out perfectly every time:
- Using Natural Peanut Butter: While natural peanut butter is great for other recipes, the oil separation can make these bars too greasy and cause the layers to separate. Stick with regular creamy peanut butter for the best results.
- Overheating the Chocolate: Chocolate can burn easily, especially in the microwave. Melt the chocolate in short intervals and stir between each one to prevent overheating. Overheated chocolate can become grainy and lose its smooth texture.
- Skipping the Parchment Paper: Parchment paper makes removing and slicing the bars much easier. Without it, you might struggle to lift the bars out of the dish, and the chocolate layer can crack.
- Not Letting the Bars Set Completely: It can be tempting to cut into the bars right away, but letting them chill until fully set is crucial for clean slices and firm layers. If the bars haven’t set, the layers may not hold together well.
Tips and Tricks
For the best results with your No-Bake Chocolate Peanut Butter Bars, here are some additional tips and tricks to elevate the flavor and appearance of this simple dessert:
- Enhance the Chocolate Flavor: If you’re a chocolate lover, consider adding a teaspoon of instant espresso powder to the melted chocolate layer. The espresso intensifies the chocolate flavor without making the bars taste like coffee.
- Use Quality Chocolate: Semi-sweet chocolate chips work great, but if you want a richer flavor, consider using high-quality dark chocolate. Chopping a chocolate bar into small pieces instead of using chips can also create a smoother, shinier top layer.
- Adjust Sweetness to Taste: You can modify the amount of powdered sugar to your preferred sweetness level. If you like a more savory peanut butter layer, reduce the powdered sugar slightly. Just keep in mind that the powdered sugar also helps thicken the mixture, so a significant reduction may affect texture.
- Get Creative with Toppings: Customize the top of your bars with a sprinkle of sea salt, crushed peanuts, or mini chocolate chips. These small additions add both flavor and a decorative touch that makes the bars look even more tempting.
Suggestions

No-Bake Chocolate Peanut Butter Bars are a delicious treat as is, but they’re also a great base for customization. Here are some ideas to add a unique twist to the classic recipe:
- Layered Variations: For a layered dessert, divide the chocolate topping into two portions and add a layer of melted white chocolate between them. This adds a contrasting color and flavor, creating a visually appealing and delicious three-layer treat.
- Add a Crunchy Base: For added texture, replace a portion of the graham cracker crumbs with crushed pretzels or cornflakes. The pretzels add a salty crunch that complements the peanut butter, while cornflakes add a lighter, airy texture.
- Mix-In Options: Try adding crushed Oreos, chopped peanuts, or mini chocolate chips into the peanut butter layer. These mix-ins enhance the flavor and provide fun pops of texture, making each bite slightly different from the last.
- Try a Nut-Free Version: For those with peanut allergies, substitute the peanut butter with almond butter, sunflower seed butter, or cookie butter. The texture will be similar, but each nut butter offers a unique taste that can transform this classic recipe.
- Make it a Healthier Option: To create a lighter version, try reducing the powdered sugar by half and substituting half of the graham cracker crumbs with ground oats. You could also use dark chocolate with a higher cocoa percentage for a less sweet but richer chocolate layer.
- Flavor-Boosting Additions: For a unique twist, consider adding a teaspoon of cinnamon or a pinch of cayenne pepper to the peanut butter layer. These spices bring a subtle warmth that enhances the flavor of the peanut butter without overwhelming the chocolate.
These creative suggestions allow you to enjoy No-Bake Chocolate Peanut Butter Bars in new ways, whether you’re looking to boost flavor, add crunch, or make a nut-free version!
FAQ
- Can I make these bars with natural peanut butter?
It’s best to stick with regular peanut butter rather than natural, as the oil separation in natural peanut butter can make the bars greasy and cause the layers to separate. If using natural peanut butter, try to find a variety that is thick and well-blended, or add a bit of powdered sugar to thicken the mixture. - How do I prevent the chocolate from cracking when slicing?
To prevent cracking, let the bars sit at room temperature for about 5 minutes after removing them from the refrigerator. This allows the chocolate to soften slightly, making it easier to slice cleanly. Using a sharp knife warmed under hot water can also help create smooth cuts. - Can I use a different type of chocolate for the topping?
Yes! While semi-sweet chocolate is a popular choice, you can use milk chocolate for a sweeter taste or dark chocolate for a more intense flavor. White chocolate is another option, although it will result in a much sweeter dessert. - How do I store the bars if I want to make them ahead of time?
These bars store well in the refrigerator for up to a week. For longer storage, place them in a freezer-safe container with parchment paper between layers to prevent sticking. They can last up to 2 months in the freezer. - Can I make this recipe vegan?
Absolutely! Substitute the butter with coconut oil or a vegan butter alternative, and use dairy-free chocolate chips for the topping. Be sure to check the labels on your graham cracker crumbs, as some may contain honey or other animal products. - What can I use instead of graham cracker crumbs?
If you’re looking for a graham cracker alternative, try using crushed digestive biscuits, vanilla wafers, or even ground oats for a similar texture and flavor.
Related Articles
For more easy, no-bake, and peanut butter-inspired treats, check out these related articles from TiffaniRecipes.com:
Conclusion
No-Bake Chocolate Peanut Butter Bars are the ultimate quick and satisfying dessert. With just a handful of ingredients and no need for an oven, these bars come together in no time, making them perfect for busy days, summer treats, or last-minute gatherings. The combination of creamy peanut butter and smooth chocolate is irresistible, and with so many ways to customize the recipe, you can make these bars your own. Whether you’re enjoying them as a family dessert, bringing them to a potluck, or storing them in the freezer for a quick treat, these bars are sure to be a hit with everyone.Happy snacking, and enjoy your No-Bake Chocolate Peanut Butter Bars!
